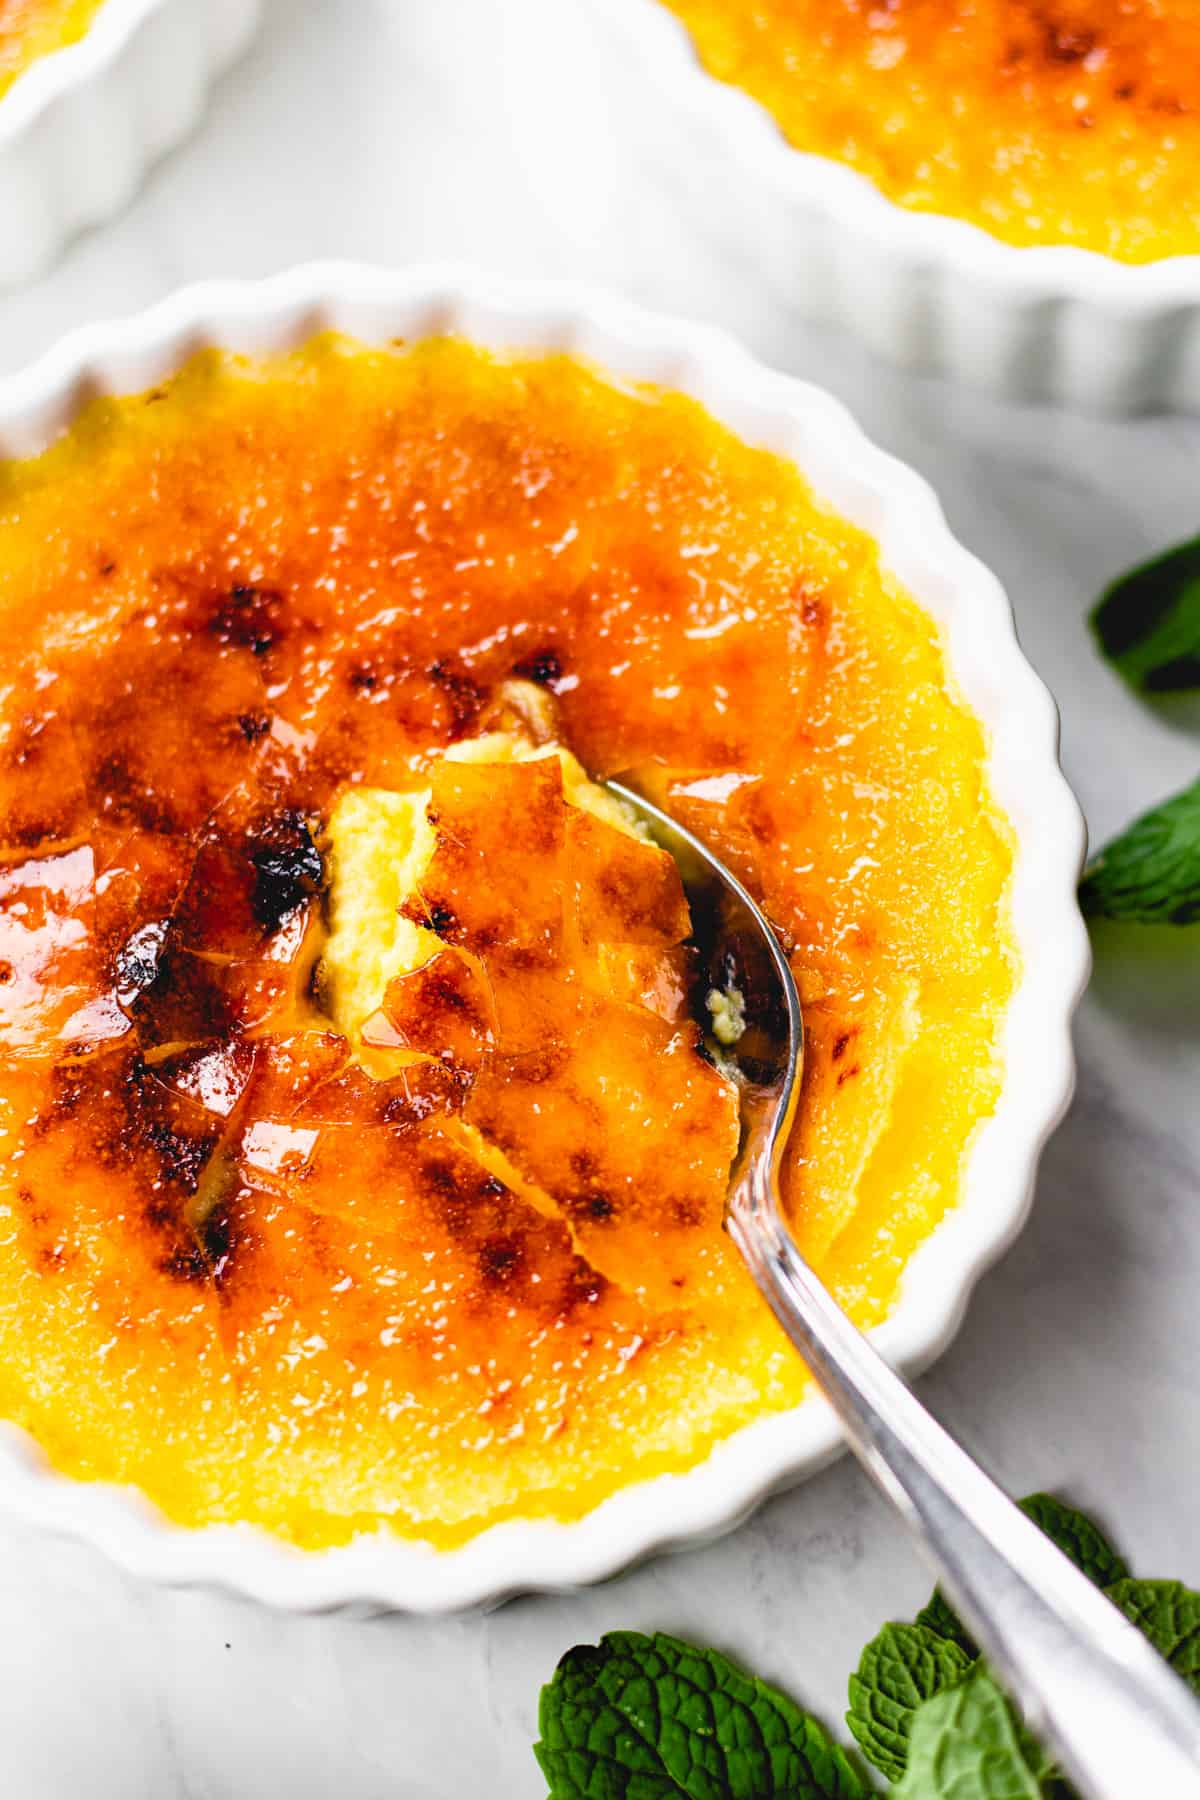
Classic Vanilla Crème Brûlée
A cold, barely-set vanilla custard under a sheet of caramel thin enough to crack with the back of a spoon. It takes five ingredients and a water bath, and most of the work is waiting for it to chill.
Ingredients
Makes 6 custards
Custard
Caramelized top
Instructions
- 1
Set up the oven and the bath
Heat the oven to 325°F with a rack in the middle. Fold a clean kitchen towel into the bottom of a roasting pan or 9x13-inch baking dish and set six 6-ounce ramekins on it — the towel stops them sliding and buffers the heat from below. Put a kettle or saucepan of water on to boil and leave it there; you want it hot when the custard is ready.
- 2
Infuse the cream
Combine the cream, half the granulated sugar (1/4 cup), the salt, and both the vanilla seeds and the scraped pod in a saucepan. Warm over medium heat, stirring now and then, until the sugar dissolves and small bubbles ring the edge of the pan — steaming, not boiling. Pull it off the heat, cover, and let it sit for 15 minutes so the vanilla has time to bloom into the fat.
- 3
Whisk the yolks
Whisk the yolks with the remaining 1/4 cup sugar just until smooth and slightly lightened, about 30 seconds. Stop there. Beating air into the yolks gives you a foamy, pocked custard instead of a dense one, and no amount of straining later will fix it.
- 4
Temper and combine
Fish out the vanilla pod. Whisking the yolks constantly, pour in about a cup of the hot cream in a thin stream, then another cup, then the rest. Going slowly at the start is what keeps the yolks from scrambling — once the first cup is in, the mixture is warm enough to take the rest quickly.
- 5
Strain and skim
Pour the custard through a fine-mesh sieve into a measuring cup or pitcher with a spout, then stir in the vanilla extract. The sieve catches any set bits of yolk and the chalaza, and it is the single step that separates a silky custard from a slightly grainy one. Skim off any foam on the surface with a spoon.
- 6
Fill and bake
Divide the custard among the ramekins, filling each to about 1/4 inch below the rim. Set the pan on the oven rack, then pour boiling water into the pan until it reaches halfway up the sides of the ramekins — pour at a corner, away from the custards. Bake 30 to 40 minutes. They are done when the outer inch is set and the centers wobble as a single soft mass when you nudge the pan; a thermometer in the middle should read 170–175°F. If the center still sloshes like liquid, give it another 5 minutes.
- 7
Cool, then chill hard
Leave the pan on a rack and let the ramekins sit in the water for 20 minutes, then lift them out with tongs and cool to room temperature. Refrigerate uncovered for 1 hour, then cover and chill at least 4 hours and ideally overnight. The custard needs to be thoroughly cold before torching, or the caramel will sink and melt into it.
- 8
Sugar and torch
Right before serving, blot each surface dry with a paper towel — condensation is the main reason sugar refuses to caramelize evenly. Sprinkle 1 teaspoon of sugar over each custard and tilt the ramekin to spread it into a thin, even film with no bare patches or drifts. Hold a kitchen torch 2 to 3 inches away and keep it moving in small circles; the sugar will liquefy, bubble, and turn deep amber. Pull back just before it looks as dark as you want, since it keeps coloring for a second or two. Let the crust harden for 2 minutes, then serve within about 15 minutes.
You did it! Help us bring baking back home by selling your delicious baked goods on Homebaked!
Baker's Tips
- 1.
No torch? Set the chilled ramekins on a sheet pan and slide them 3 inches under a preheated broiler for 2 to 4 minutes, rotating the pan and never looking away. Then chill the custards 15 minutes to re-firm the warmed top layer.
- 2.
Turbinado gives a thicker, more rustic crack; superfine or granulated sugar melts faster and gives a thinner, glassier pane. Both work — just keep the layer thin either way.
- 3.
For a crust that stays crisp longer on the table, torch one thin layer, wait 30 seconds, add a second light dusting, and torch again.
- 4.
Shallow, wide ramekins bake faster than tall narrow ones and give a better custard-to-caramel ratio. Start checking wide 4-ounce dishes at 22 minutes.
- 5.
Every ingredient here is naturally gluten-free, but check your vanilla extract label if you are baking for someone with celiac disease — a few bargain extracts use grain alcohol that hasn't been distilled to a safe standard.
- 6.
Save the scraped vanilla pod: rinse, dry it, and bury it in a jar of sugar for vanilla sugar you can use on the next batch.
Equipment
- Six 6-ounce ramekins
- Roasting pan or 9x13-inch baking dish
- Medium saucepan
- Fine-mesh sieve
- Whisk
- Measuring cup or pitcher with a pouring spout
- Kitchen torch
- Instant-read thermometer
Storage
Un-torched custards keep, covered, in the refrigerator for up to 4 days — this is the best way to make them ahead. Once torched, serve within 20 minutes; the crust softens as moisture migrates up from the custard. Leftover torched custards can be refrigerated uncovered overnight, but the top will have gone syrupy. Do not freeze; the custard separates on thawing.