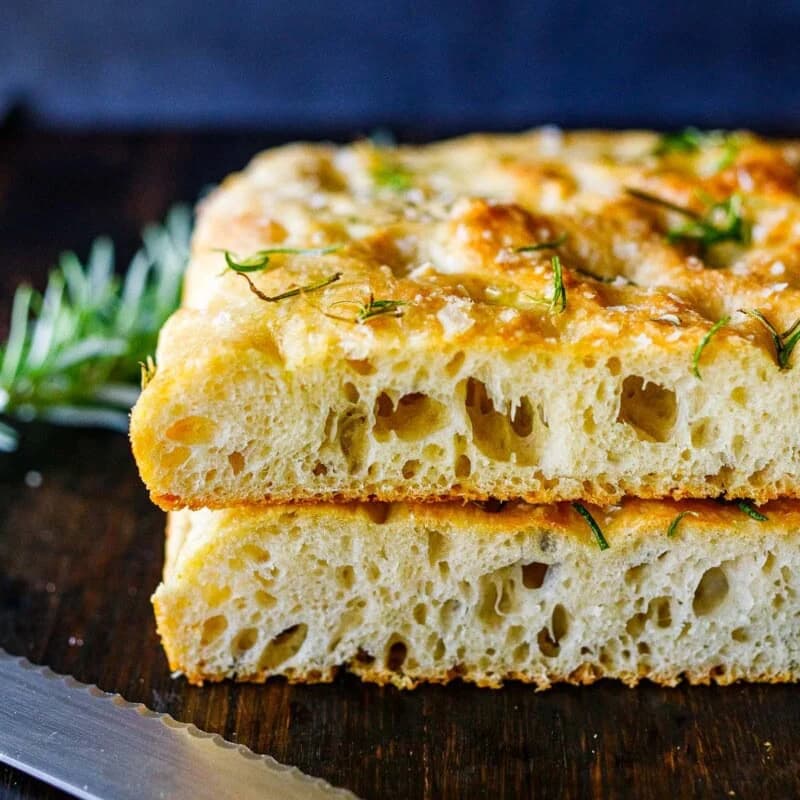
Rosemary Sea Salt Focaccia
A no-knead, overnight dough that bakes into a pillowy slab with a shatter-crisp, olive-oil-fried bottom and deep dimples full of rosemary and flaky salt. Ten minutes of actual work; the fridge does the rest.
Ingredients
Makes One 9x13-inch focaccia (12 pieces)
Dough
Pan and Topping
Instructions
- 1
Mix the dough
Stir the honey into the warm water until it dissolves. In a large bowl, whisk the flour, yeast, and fine sea salt together so the salt is evenly dispersed. Pour in the honey water and the 2 tablespoons of olive oil, then stir with a sturdy spatula or your hand until there is not a speck of dry flour left. It will look like a shaggy, sticky paste rather than a tidy ball — that is exactly right at 80% hydration. Cover the bowl and leave it on the counter for 20 minutes.
- 2
Build strength with two folds
Wet one hand, reach under the edge of the dough, stretch it upward until it resists, and fold it over the center. Turn the bowl a quarter turn and repeat until you have gone all the way around, about eight pulls. Rest 20 minutes, then do a second round. The dough will go from slack and soupy to noticeably smoother and more elastic. Cover tightly.
- 3
Cold ferment overnight
Refrigerate the covered bowl for 12 to 24 hours. The cold slows the yeast so flavor develops without the dough overproofing, and the long rest is where those large, irregular bubbles come from. The dough should roughly double and look blistered across the surface. It will keep up to 3 days in the fridge if your schedule shifts.
- 4
Transfer to the pan
Pour 3 tablespoons of olive oil into a 9x13-inch metal pan and tilt it so the oil coats the bottom and climbs the sides. Scrape the cold dough into the pan, then fold the four edges into the center like an envelope and flip it seam side down so the whole surface is slicked with oil. Press it outward with flat fingers; it will spring back and refuse to reach the corners, which is fine.
- 5
Final proof
Cover loosely and let the dough sit at room temperature for 2 to 4 hours. It needs to come fully to room temperature and then get visibly puffy and domed, filling the pan corner to corner and jiggling when you shake it. The test: press a fingertip in about half an inch; the dent should fill back in slowly and incompletely. If it springs back fast, give it another 30 minutes. This step is the single biggest difference between airy focaccia and dense focaccia.
- 6
Heat the oven
About 30 minutes before baking, set a rack in the lower third of the oven and heat it to 425°F. If you have convection, use it at 425°F for a crisper bottom. Let the oven come fully up to temperature — a hot oven is what gives you that immediate puff.
- 7
Dimple and dress
Whisk the tablespoon of warm water into the 2 tablespoons of olive oil to make a loose brine, then pour it over the dough. Oil your fingers, hold them slightly spread, and press straight down through the dough to the floor of the pan, working in rows about an inch apart across the whole surface. Push firmly and do not be shy — shallow dimples disappear in the oven. The brine will pool in the wells. Scatter the rosemary and flaky salt over the top.
- 8
Bake
Bake for 22 to 28 minutes, rotating the pan once halfway through, until the top is deep gold and the edges have pulled slightly from the sides of the pan. Lift a corner with a thin spatula to check the underside: it should be browned and crisp, almost fried. If the top is pale but the bottom is done, move the pan to the upper rack for 3 to 5 more minutes.
- 9
Cool and cut
Run a spatula around the edge and slide the focaccia out onto a wire rack right away so steam can escape and the bottom stays crisp. Let it rest at least 10 minutes before cutting — hot focaccia tears and compresses under a knife. Cut into 12 squares with a serrated knife or bench scraper.
You did it! Help us bring baking back home by selling your delicious baked goods on Homebaked!
Baker's Tips
- 1.
Weigh the flour if you can. A cup scooped straight from the bag can run 30g heavy, and that extra flour is what turns a light, bubbly focaccia into a dense one.
- 2.
Use a light-colored metal pan rather than glass or ceramic. Metal conducts heat fast enough to crisp the oil-coated bottom; glass insulates and leaves it soft and pale.
- 3.
Bread flour works in place of all-purpose and gives a chewier, slightly taller crumb. Keep the water the same.
- 4.
The dimples need to go all the way to the bottom of the pan. If you only press halfway, the dough puffs up and swallows them, and the oil and salt slide off the top instead of pooling.
- 5.
Dried rosemary burns and turns bitter at this temperature. Use fresh, and toss it with a little of the oil first if your leaves are very fine.
- 6.
Easy variations: press halved cherry tomatoes, thin lemon slices, pitted olives, or slivers of garlic into the dimples after brining. Anything delicate should be tucked into a well rather than left on the surface.
- 7.
Running late on the final proof? Dough that is still cold in the center will bake up gummy. Give it the full time it needs — watch the dough, not the clock.
Equipment
- 9x13-inch metal baking pan
- Large mixing bowl
- Flexible spatula or dough whisk
- Kitchen scale
- Wire cooling rack
- Serrated knife or bench scraper
Storage
Focaccia is at its best the day it is baked. Keep leftovers in a paper bag or loosely wrapped at room temperature for up to 2 days — an airtight container traps steam and softens the crust. To revive, warm pieces in a 350°F oven for 5 to 7 minutes. For longer storage, cut into squares, wrap tightly, and freeze for up to 3 months; reheat from frozen at 350°F for about 10 minutes. Do not refrigerate, which stales the crumb quickly.