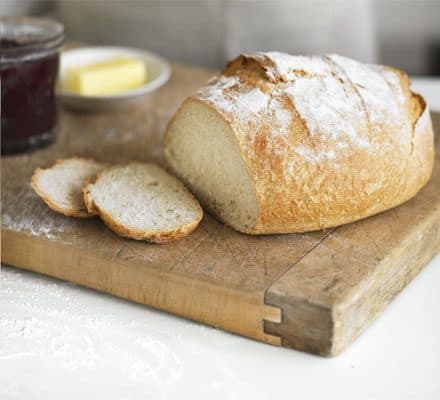
Country Loaves, Gluten Free
Two big, blistered country loaves built on an overnight poolish, with bread flour, whole wheat, and a little rye for that deep, faintly sour bakery flavor. The dough asks for patience rather than skill — most of the work happens while you sleep.
Ingredients
Makes 2 round loaves (about 1 1/2 lb each)
Psyllium gel
Dough
Instructions
- 1
Make the psyllium gel
In a large bowl, whisk the 2 3/4 cups lukewarm water with the honey, then whisk in the psyllium husk powder all at once and keep whisking for 20 seconds so it does not clump. Let it stand 10 minutes, until it thickens into a loose, translucent gel the texture of soft jelly. This gel is doing the job gluten normally does — it is what lets these loaves hold a round shape instead of spreading into puddles.
- 2
Whisk the dry ingredients
In a second bowl, thoroughly whisk the gluten-free flour blend, buckwheat flour, instant yeast, and salt. The buckwheat is here for the earthy, slightly rustic flavor that rye gives the wheat version. There is no overnight poolish in this bake — gluten-free doughs do not gain structure from long fermentation, so the flavor comes from the flours themselves.
- 3
Mix the dough
Add the olive oil and vinegar to the psyllium gel, then add the dry ingredients and mix hard with a sturdy spatula for 2 to 3 minutes, or with a stand mixer and paddle on medium for 2 minutes. You are looking for a thick, sticky, scoopable dough somewhere between batter and bread dough — nothing you could knead. Scrape down the sides and make sure no dry flour is hiding at the bottom.
- 4
Rest to hydrate
Cover and let the dough sit for 30 minutes. The starches in the blend absorb water slowly, and skipping this rest is the single most common reason gluten-free loaves bake up gritty or dense. When the time is up, the dough will feel noticeably firmer, smoother, and less tacky.
- 5
Shape the loaves
Divide the dough in two with a wet bench scraper, about 715g per piece. With wet hands, cup and rotate each piece on the counter into a smooth dome, smoothing out any cracks in the surface as you go. There is no stretching or tensioning here — just pat and turn until it looks even. Set each round seam side down on its own square of parchment and dust the tops with rice flour.
- 6
Proof once, and not too long
Cover loosely and proof at room temperature for 60 to 75 minutes, until the loaves have grown by about half and feel puffy and light when you nudge the parchment. Do not wait for a doubling — gluten-free dough has no gluten network to catch itself, and an overproofed loaf collapses the moment it hits the oven. Meanwhile, preheat a Dutch oven with its lid at 475°F for at least 40 minutes.
- 7
Score and bake
Slash the top of one loaf just 1/4 inch deep in a single line — shallower than you would cut a wheat loaf, since deep cuts make this dough deflate. Lower it in on the parchment, cover, reduce the oven to 450°F, and bake 30 minutes. Remove the lid and bake 20 to 25 minutes more, until the crust is firm and deeply browned and the center reads 208 to 210°F. Gluten-free loaves need that extra degree or two of doneness to set properly. Reheat the pot for 10 minutes, then bake the second loaf.
- 8
Cool fully before slicing
Cool on a rack for at least 3 hours, and ideally until completely cold. Gluten-free crumb sets much more slowly than wheat crumb, and cutting a warm loaf will leave the inside sticky and compressed. The crust softens slightly as it cools; a few minutes in a hot oven right before serving brings the crackle back.
You did it! Help us bring baking back home by selling your delicious baked goods on Homebaked!
Baker's Tips
- 1.
Your kitchen temperature matters more than any time in this recipe. Below 68°F everything stretches out by an hour or more; above 78°F, start checking the bulk rise after 90 minutes.
- 2.
Rice flour does not absorb moisture the way wheat flour does, so a banneton dusted with it releases the dough cleanly every time. It is worth keeping a small bag just for this.
- 3.
If you want a more open, hole-filled crumb, cold-proof the shaped loaves overnight and bake them straight from the fridge. Cold dough also takes a scoring blade far more cleanly.
- 4.
No Dutch oven? Bake on a preheated stone or heavy sheet pan and pour a cup of boiling water into a metal pan on the rack below as the loaves go in. The crust will be slightly thinner but still excellent.
- 5.
Weigh if you can. Flour cups vary by as much as 20 percent depending on how you scoop, and in a lean dough like this one that swing is the difference between a supple dough and a stiff one.
- 6.
The rye can be swapped for more whole wheat if that is what you have, but keep it under about 20 percent of the total flour or the loaves will spread instead of rising.