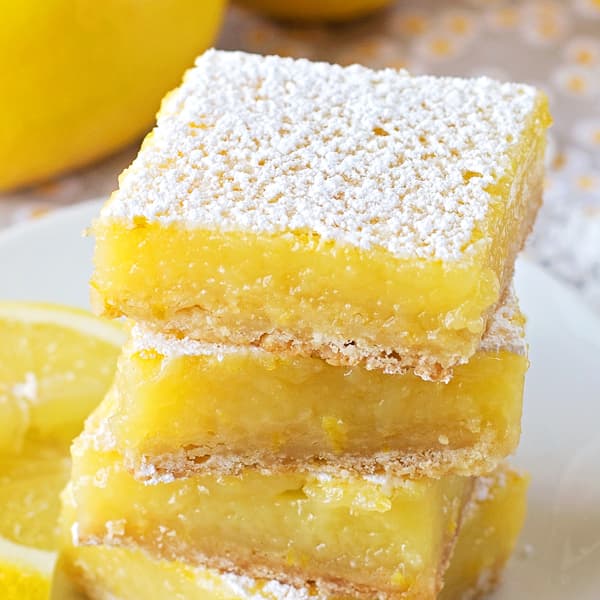
Classic Lemon Bars, Gluten Free
A thick layer of tart, silky lemon curd baked right onto a buttery press-in shortbread crust. They cut into clean, bright yellow squares and taste even better cold from the fridge.
Ingredients
Makes 24 bars
Shortbread crust
Lemon filling
For finishing
Instructions
- 1
Heat the oven and line the pan
Set a rack in the middle of the oven and heat it to 350°F. Line a 9x13-inch metal pan with two strips of parchment running in opposite directions, letting a couple of inches hang over the long sides. Those flaps are your handles later, so don't skip them. Metal is better than glass here, since glass holds heat and tends to overcook the edges of the filling before the center sets.
- 2
Zest and juice the lemons first
Zest the lemons before you cut them, and take only the yellow part of the peel. You need 3 tablespoons of zest total, 1 for the crust and 2 for the filling, so keep them separate. Then juice the lemons and pour the juice through a fine strainer to catch seeds and pulp. Measure after straining, since pulp can throw off the volume.
- 3
Mix and press the crust, then let it rest
Whisk the gluten-free blend, xanthan gum, powdered sugar, salt, and 1 tablespoon of zest together in a medium bowl, rubbing the zest into the dry mix with your fingertips. Pour in the melted butter and vanilla and stir with a fork until the dough clumps when squeezed. Press it into an even layer in the lined pan using the flat bottom of a measuring cup. Now let the pressed crust sit at room temperature for 25 minutes before baking. Rice and starch flours absorb liquid slowly, and this rest is what turns a sandy, crumbly crust into one that holds together when you cut it.
- 4
Blind-bake the crust
Bake for 24 to 28 minutes, a few minutes longer than a wheat crust needs. You're looking for golden edges and a center that looks completely dry and matte, with no shine left. Gluten-free crusts hold moisture longer, and a crust pulled early will go soft under the filling. Leave the oven on and work quickly on the filling, because the crust should still be hot when you pour.
- 5
Whisk the filling
In a large bowl, whisk the granulated sugar, gluten-free blend, and salt together so there are no lumps. Add the eggs and whisk until smooth and pale, about a minute. Whisk in the remaining 2 tablespoons of zest and the lemon juice. Mix this right before you pour it, since the acidic juice starts tightening the eggs if it sits.
- 6
Pour over the hot crust and bake
Pour the filling over the hot crust and return the pan to the oven immediately. Bake 25 to 32 minutes. The filling is done when the surface is matte and the center moves as one soft, unified wobble when you nudge the pan. Starch-based blends set up a touch firmer as they cool than wheat flour does, so err on the side of pulling it early.
- 7
Cool, then chill
Cool the pan completely on a wire rack, 1 to 2 hours, then refrigerate for at least 2 hours or overnight. The chill is doing double duty here, firming the custard and letting the gluten-free crust set up sturdy enough to slice.
- 8
Cut and dust
Lift the slab out by the parchment onto a cutting board. Cut into 24 bars with a long thin knife, wiping the blade clean between every cut. Dust with powdered sugar through a fine sieve just before serving.
You did it! Help us bring baking back home by selling your delicious baked goods on Homebaked!
Baker's Tips
- 1.
Use fresh lemons, not bottled juice. Bottled juice is pasteurized and tastes flat and slightly metallic in a filling this lemon-forward, and you lose the zest entirely.
- 2.
Rub the zest into the sugar or flour with your fingertips. It takes ten seconds and releases the citrus oils, which carry far more lemon aroma than the juice does.
- 3.
If you want a sharper, more tart bar, cut the granulated sugar to 1 3/4 cups. Going lower than that starts to affect how the custard sets.
- 4.
For picture-perfect tops, skim off any surface foam with a spoon right after pouring the filling into the pan.
- 5.
A pale, undercooked line where the crust meets the filling usually means the crust cooled down before the filling went on. Pour while the crust is still hot and the two layers fuse.
- 6.
Freeze the cut bars on a tray for 20 minutes before packing them for a potluck. They travel without sticking to each other and thaw in about 30 minutes.