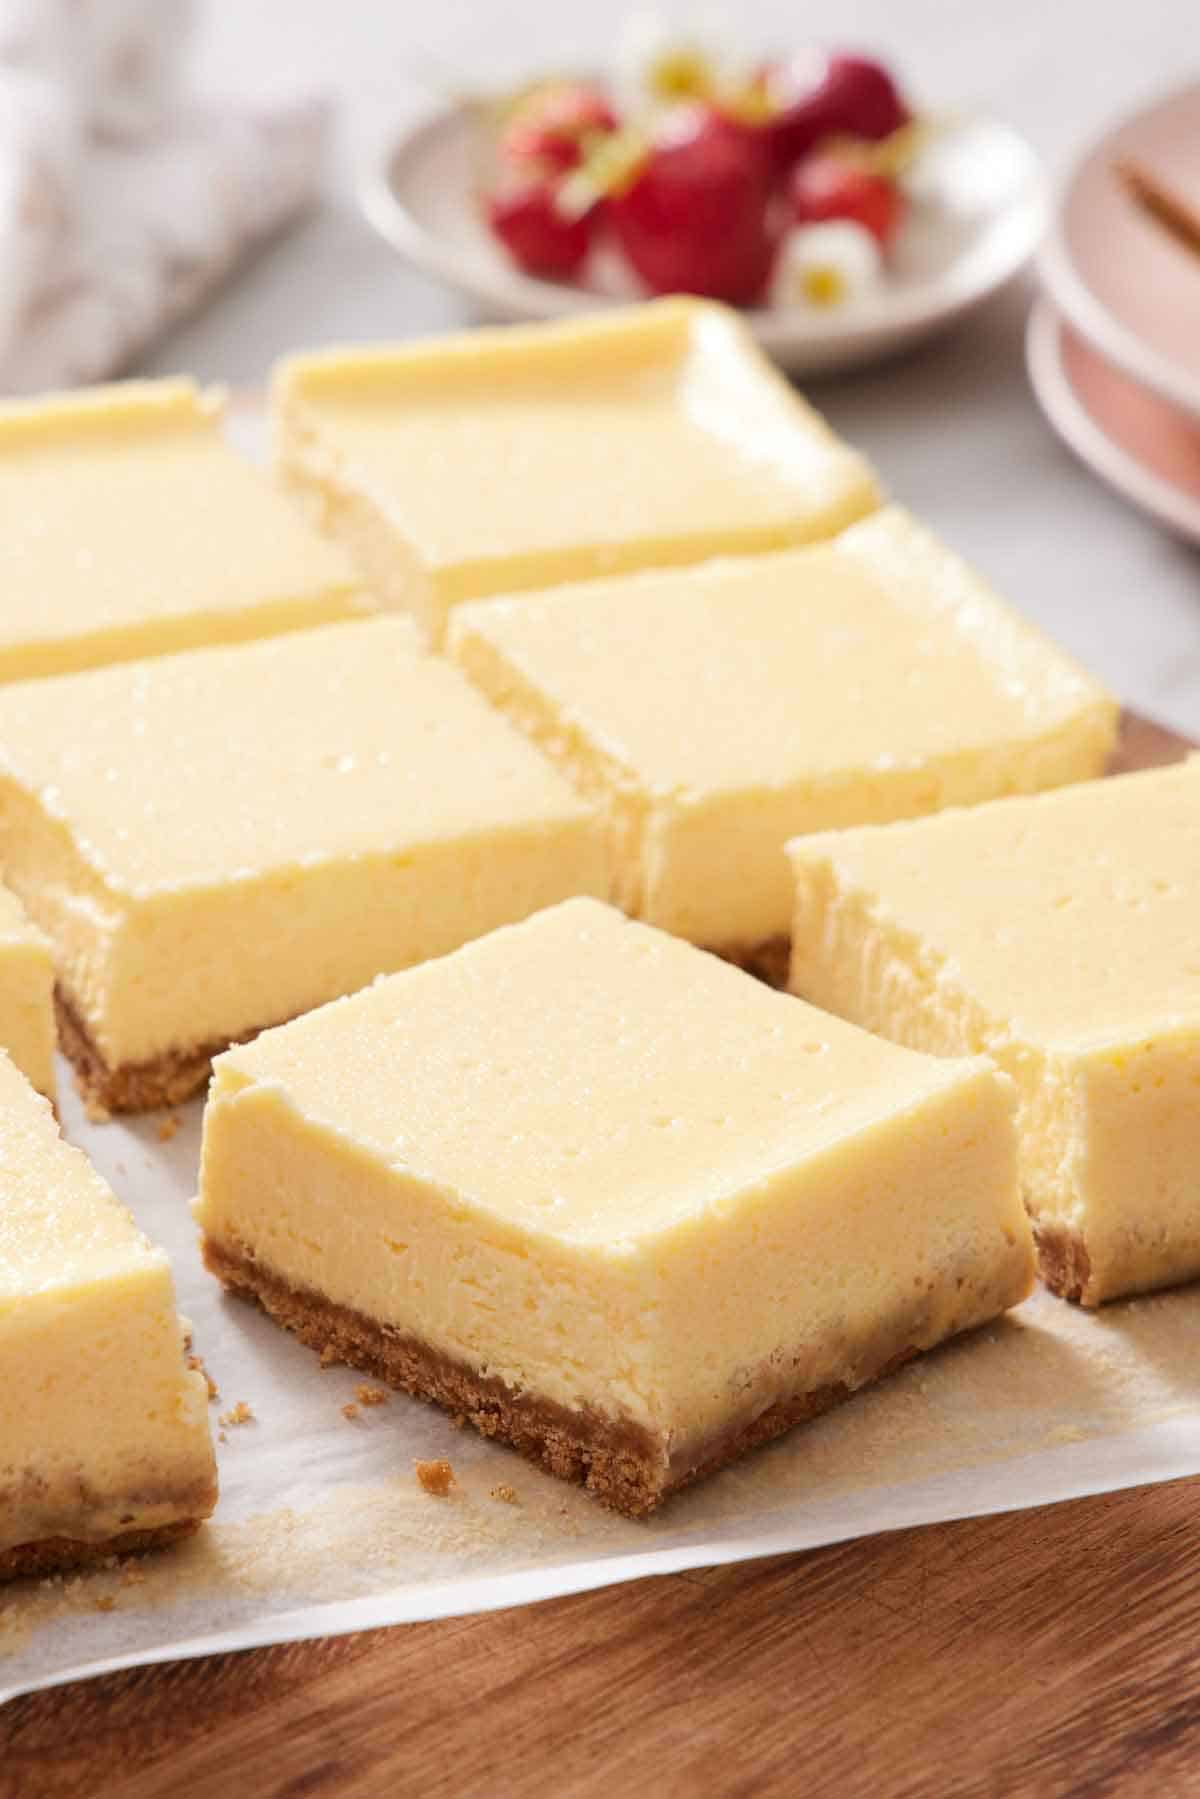
Classic Cheesecake Bars
All the dense, tangy richness of a real baked cheesecake, in a sliceable bar with a thick buttery graham crust. No springform pan, no water bath, no cracked top to apologize for.
Ingredients
Makes 24 bars
Crust
Filling
Instructions
- 1
Heat the oven and line the pan
Set a rack in the middle of the oven and heat it to 350°F (175°C). Line a 9x13-inch metal baking pan with parchment, letting it hang over the two long sides by an inch or so. Those flaps are how you lift the whole slab out later, so don't skip them.
- 2
Press the crust
Stir the graham crumbs, sugar, and salt together in a medium bowl, then pour in the melted butter and mix until every crumb looks damp, like wet sand. Dump it into the pan and press it firmly and evenly across the bottom. Use the flat bottom of a measuring cup and lean on it — a loosely packed crust turns to gravel when you slice.
- 3
Par-bake the crust
Bake for 10 minutes, until the crust smells toasty and looks slightly darker at the edges. Pull it out and set it on a rack, then turn the oven down to 325°F (165°C). The crust doesn't need to be cold before filling, just no longer hot.
- 4
Beat the cream cheese smooth
In a stand mixer with the paddle, or a large bowl with a hand mixer, beat the room-temperature cream cheese with the sugar, flour, and salt on medium for a full 2 minutes, scraping the bowl and paddle twice. Get every lump out now — once the eggs go in, any lump you still see is a lump you'll eat. Avoid the whisk attachment, which whips in air you don't want.
- 5
Add the wet ingredients gently
Drop the mixer to low. Beat in the sour cream, then the eggs one at a time, mixing just until each disappears. Add the vanilla and lemon juice and stop the moment the batter looks uniform. Air beaten in here becomes bubbles that puff, then collapse into cracks.
- 6
Fill and settle the batter
Scrape the batter over the warm crust and smooth the top with an offset spatula. Lift the pan an inch off the counter and drop it four or five times to bring trapped air bubbles to the surface, popping any stubborn ones with a toothpick.
- 7
Bake until the center wobbles
Bake at 325°F for 45 to 50 minutes. You're looking for puffed, matte edges and a 3-inch circle in the center that still jiggles as one soft unit when you nudge the pan — not liquid sloshing, but not firm either. It will finish setting as it cools, so pull it on the early side.
- 8
Cool slowly, then chill hard
Turn the oven off, crack the door, and leave the pan inside for 30 minutes. This gradual cooldown is the single best insurance against a cracked top. Move the pan to a rack until it's fully room temperature, then refrigerate uncovered for at least 6 hours, ideally overnight. Warm cheesecake bars will not slice cleanly, no matter how patient you feel.
- 9
Lift and slice
Use the parchment flaps to lift the cold slab onto a cutting board. Cut with a long thin knife dipped in hot water and wiped dry between every single cut — that one habit is the difference between bakery-sharp edges and smeared ones. Cut 4 rows by 6 for 24 bars.
You did it! Help us bring baking back home by selling your delicious baked goods on Homebaked!
Baker's Tips
- 1.
Cold cream cheese is the number one cause of lumpy cheesecake. Unwrap the blocks and leave them on the counter for 2 hours, or cube them to speed it up. They should dent easily under a finger but still hold their shape.
- 2.
Use brick-style full-fat cream cheese only. Whipped and tub-style versions carry extra air and water and will bake into a loose, weeping filling.
- 3.
The lemon juice isn't there to make the bars taste lemony — it sharpens the tang of the cream cheese so the whole thing doesn't read as flatly sweet. A teaspoon of finely grated lemon zest alongside it is a good addition if you like more brightness.
- 4.
If your oven runs hot or you're using a glass pan, start checking at 40 minutes. Glass insulates, so a glass pan may instead need an extra 5 to 10 minutes — go by the wobble, not the clock.
- 5.
A thin crack or two near the edge is cosmetic and nothing to fuss over. Cover it with a spoonful of berry sauce, salted caramel, or a drift of fresh raspberries before serving.
- 6.
These are easy to dress up: swirl 1/3 cup of thick fruit jam through the batter with a knife before baking, or fold 1 cup of mini chocolate chips into the finished batter.
Equipment
- 9x13-inch metal baking pan
- Parchment paper
- Stand mixer with paddle attachment or electric hand mixer
- Large mixing bowl
- Food processor or zip-top bag and rolling pin (for crushing crackers)
- Flat-bottomed measuring cup or glass
- Offset spatula
- Long thin slicing knife
- Wire cooling rack
Storage
Keep the bars covered in the refrigerator for up to 5 days; they're best from day one through day three, after which the crust starts to soften. Store them in a single layer in an airtight container, or with parchment between layers if you need to stack. To freeze, chill and slice first, then freeze the bars on a tray until solid, wrap individually, and keep in a freezer bag for up to 2 months. Thaw overnight in the fridge rather than on the counter.