How to Price Baked Goods for Profit
A step-by-step way to figure out what your bakes are actually worth, so you stop guessing and start making money.
Pricing is the part of selling baked goods that almost nobody enjoys, and it's the part that quietly decides whether your baking pays you or slowly drains your grocery budget. Most home bakers start by looking at what the shop down the street charges, knocking a couple dollars off because they feel like an amateur, and calling it a day. That number has nothing to do with what your cookies actually cost to make, and it usually leaves you working for something like four dollars an hour.
The good news is that pricing is math, not intuition. Once you build the number from the ground up (ingredients, packaging, your time, and the costs of simply being open for business), you'll have a price you can defend without flinching. This guide walks through that build, with a full worked example at the end. Set aside an hour with a calculator and your last few grocery receipts and you'll come out the other side with real numbers.
Why Underpricing Hurts More Than It Helps
Low prices feel like a kindness to your customers and a safety net for your confidence. In practice they do three bad things at once. They cap how much you can grow, because every new order costs you money you can't recover. They attract the customers who care least about quality and most about price, which is not the crowd you want when you're hand-laminating croissants at 5 a.m. And they're painful to fix later, because raising a price on an existing customer is much harder than setting it correctly the first time.
It also helps to know that the demand is genuinely there. Roughly 65% of households say they'd rather get their bread and treats from a home baker than off a grocery store shelf. People aren't looking for the cheapest possible loaf. They're looking for one that tastes like someone made it on purpose, and they expect to pay accordingly.
Step One: Find Your True Cost of Goods
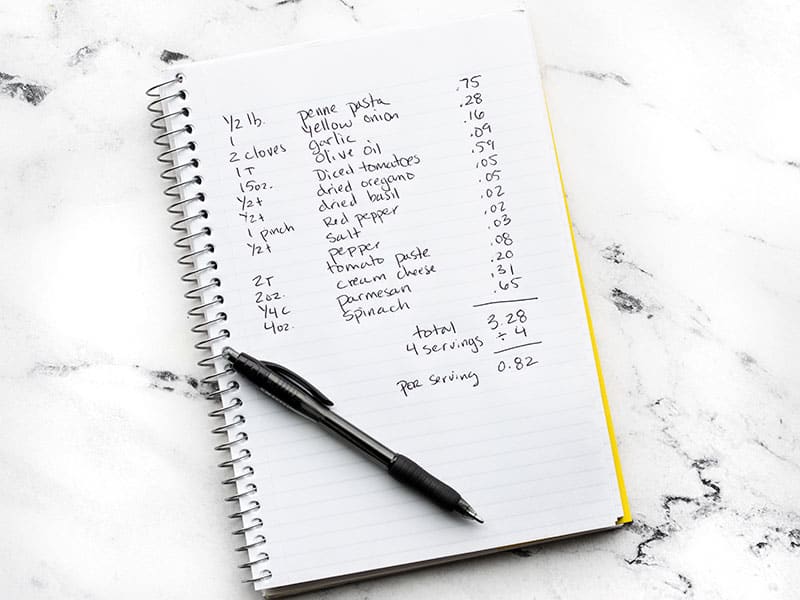
Cost of goods, often shortened to COGS, is everything that physically goes out the door with the order. That means ingredients and packaging, nothing else yet. The trick is breaking bulk purchases down to a per-unit cost so you can scale it to any recipe.
- 1List every ingredient in the recipe with the exact amount you use, by weight where possible.
- 2For each one, write down what you paid for the full package and how much that package contains. A 5 lb bag of flour at $4.50 is 2,268 grams, so flour costs you about $0.002 per gram.
- 3Multiply your per-gram (or per-unit) cost by the amount the recipe calls for.
- 4Do the same for the small stuff you're tempted to skip: vanilla, salt, yeast, parchment, cooking spray. Individually they're pennies. Across a year of baking they're real money.
- 5Add your packaging: box, liner, sticker, ribbon, bag, label, and the bakery twine you're weirdly attached to.
- 6Add the total, then divide by how many units the batch yields. That's your cost of goods per unit.
Recalculate this a couple of times a year, and immediately after any big jump in butter, eggs, or chocolate. Those three swing hard enough to erase a thin margin without you noticing until the quarter's over.
Don't Let Packaging Eat Your Margin
Packaging is the line item that surprises people most. A nice rigid box with a window, a food-safe liner, and a printed label can easily run a dollar or more per order, which on a $6 item is a serious bite. Buying in bulk is the fix, but bulk pricing on small quantities is genuinely hard to find when you're ordering fifty boxes instead of five thousand.
This is one of the areas where the platforms built specifically for cottage bakeries have an edge. Homebaked, for instance, offers wholesale packaging to its bakers at roughly half what the same supplies cost on Amazon, which on a high-volume item like cookies or cinnamon rolls can be the difference between a workable margin and a token one. Whatever your source, price your packaging deliberately instead of absorbing it as a rounding error.
Step Two: Pay Yourself for Your Time
Your labor is not free, and leaving it out of the price is the single most common reason home bakers burn out. Pick an hourly rate you'd actually accept from an employer for skilled work. For most bakers starting out, somewhere between $18 and $30 an hour is realistic, and it should go up as your skill and demand do.
Then time the whole job honestly, not just the fun parts. That includes shopping, mixing, shaping, baking, cooling, decorating, packing, answering messages, and cleaning the kitchen afterward. Time three or four real batches with a timer before you settle on a number, because almost everyone underestimates by 30% or more on the first guess.
- Active time is time you're standing there working. Count all of it.
- Passive time (proofing, chilling, baking) doesn't get billed at full rate, since you can be doing something else, but don't pretend it's zero if it keeps you tied to the kitchen.
- Batch size is your best lever here. Baking six dozen cookies takes maybe 40% longer than baking two dozen, not three times as long, and the labor cost per unit drops accordingly.
- Decorating-heavy work (piped sugar cookies, custom cakes) should be timed and priced separately from the bake itself. It's a different skill at a different rate.
Step Three: Account for Overhead
Overhead is everything you pay to be in business that doesn't travel out the door with a single order. It's easy to ignore because it doesn't show up on a per-batch receipt, but it's real money leaving your account every month.
- Utilities, especially the oven, which is the hungriest appliance in the house
- Cottage food license, permits, and any required food handler certification
- Liability insurance
- Equipment replacement and repair (mixers, pans, and thermometers all have a lifespan)
- Website, domain, or platform costs
- Payment processing fees
- Mileage and delivery costs
- Market stall fees, if you do markets
- Marketing, photography props, business cards, and samples
Add up your monthly overhead, then divide it by the number of units you realistically expect to sell in a month. If your overhead runs $180 a month and you sell 60 dozen cookies, that's $3.00 of overhead per dozen. Redo this calculation as your volume grows, because overhead per unit falls fast once you're busy.
Step Four: Add Your Profit
Here's the distinction that trips people up. Your hourly rate pays you as a worker. Profit pays the business, and the business needs its own money to buy a second sheet pan rack, cover a slow month, or absorb a batch that goes in the bin. If your price only covers costs plus your wage, you have a job, not a business.
A profit margin of 20% to 30% is a reasonable target for a home bakery. Just be careful about which formula you use, because margin and markup are not the same thing. To build in a true margin, divide your total cost by (1 minus your target margin). A $14.78 cost at a 25% margin means $14.78 ÷ 0.75, which is $19.71. If you'd simply multiplied by 1.25, you'd have landed at $18.48 and quietly given away part of your profit.
A Worked Example: Cookies by the Dozen
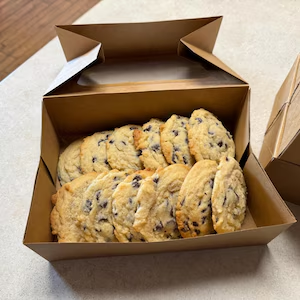
Say you bake a batch of 72 chocolate chip cookies (6 dozen) and sell them boxed by the dozen. Here's the full build.
- 1Ingredients for the batch come to $21.60, or $0.30 per cookie, so $3.60 per dozen.
- 2Packaging is a box, liner, and label at $0.85 per dozen.
- 3Cost of goods per dozen is $3.60 + $0.85 = $4.45.
- 4The batch takes 2 hours of active work start to finish. At $22 an hour, that's $44 of labor, spread across 6 dozen, so $7.33 per dozen.
- 5Overhead runs $180 a month against 60 dozen sold, so $3.00 per dozen.
- 6Total cost per dozen is $4.45 + $7.33 + $3.00 = $14.78.
- 7At a 25% profit margin: $14.78 ÷ 0.75 = $19.71.
- 8Round to a clean $20 per dozen.
Twenty dollars a dozen may feel high if you've been charging twelve. Look at what the number is actually made of, though. You're paid a fair wage, your oven and insurance are covered, and the business keeps about five dollars to reinvest. Charging twelve meant paying yourself roughly eight dollars an hour and covering your overhead out of pocket.
Sanity-Check Against the Market
Your calculated price is the floor, not the ceiling. Once you have it, compare it to what's actually happening around you before you commit.
- Check local bakeries, other micro bakery sellers in your area, and farmers market vendors selling something comparable.
- If your number lands well above the local range, look at batch size and process efficiency first rather than immediately cutting your price.
- If your number lands well below the local range, raise it. You are allowed to charge what the market charges.
- Factor in what makes yours different: organic or local ingredients, hand-shaped rather than scooped, custom flavors, delivery included. Those justify sitting at the top of the range.
- Price whole numbers or clean halves. $20 and $7.50 read as confident. $19.37 reads as someone who hasn't thought it through.
Pricing Mistakes to Watch For
- Forgetting the failed batch. Build a small waste allowance (around 3% to 5%) into your costs, because some bakes don't make it.
- Giving a "friends and family" discount to everyone. Decide who gets one and keep the list short.
- Pricing custom work like standard work. Custom means consultation time, test bakes, and special-order ingredients. Charge for all three.
- Absorbing delivery. Either build it into the price or charge it separately, but don't drive across town for free.
- Discounting to win a customer who was never going to become a regular.
- Skipping sales tax in your pricing. Depending on your state, baked goods may be taxable, and you're the one who owes it whether or not you collected it.
That last one is worth a closer look, because taxes are where a lot of otherwise profitable home bakers lose the plot. Platforms built for this kind of business handle it for you. Homebaked calculates and files sales tax automatically and charges no order fees to either the baker or the customer, which matters more than it sounds like it does when you're working on a 25% margin and every percentage point of processing and commission comes straight off the top.
When and How to Raise Your Prices
Prices should move. Ingredient costs climb, your skill improves, and your waitlist gets longer. A good habit is to review your numbers every six months and after any noticeable shift in what you're paying at the store.
- 1Rerun your cost of goods with current ingredient prices.
- 2Reassess your hourly rate against your current skill and demand. If you're consistently selling out, that's the market telling you there's room.
- 3Recalculate your price with the margin you want.
- 4Give existing customers a short heads-up, two to four weeks, before the new price takes effect.
- 5Announce it plainly and without apologizing. "Ingredient costs have gone up, so prices are adjusting on the first" is a complete explanation.
- 6Expect to lose a small number of customers, and expect your revenue to go up anyway.
The Short Version
- Cost of goods = ingredients + packaging, calculated per unit
- Labor = your honest hourly rate times your honest total time
- Overhead = monthly business costs divided by monthly units sold
- Total cost = all three added together
- Price = total cost ÷ (1 minus your target margin)
- Then check it against the local market and round to a clean number
Run those six lines for every product you sell and you'll know exactly where your money is going and exactly what each item earns you. That's the whole difference between baking as an expensive hobby and baking as a business that pays you back.