How to Build an Instagram Following for a Microbakery From Zero
No followers, no ad budget, no professional camera. Here's how to turn an empty account into a line of people waiting on your next drop.
Starting an Instagram account with zero followers feels a little like setting out a bake sale table in an empty parking lot. You know the bread is good, but nobody is there to smell it yet. The good news is that a baking account has an unfair advantage over most small businesses: food is the most naturally shareable thing on the internet, and people genuinely want to find someone nearby making it. Roughly 65% of households say they'd rather their bread and treats came from a home baker than a grocery store shelf, which means the audience you're looking for already exists. Your job is to be findable, consistent, and specific enough that people remember you.
This guide walks through the whole arc: setting the account up so it works as a storefront, figuring out what to actually post, shooting decent photos on a phone, finding your first real local followers, and turning those followers into people who message you on drop day. None of it requires a design background or a lighting kit. It does require showing up more than once a week for a few months.
Set Up the Account So It Does Some Work for You
Before you post anything, spend twenty minutes on the foundation. A huge number of small baking accounts lose people at the profile because a visitor can't tell in three seconds what's sold, where, or how to get it. Switch to a professional account in settings (it's free, and it unlocks insights, which are the analytics showing who's seeing your posts and when).
Your handle and name field are two separate search tools. The handle is your brand, and the name field is where you put what you actually make and where. Instagram searches that name field, so "Juniper Bakes | Sourdough, Asheville NC" will surface for someone searching "sourdough Asheville" in a way that "@juniperbakes" alone never will.
- Handle: short, spellable out loud, no numbers or underscores if you can help it
- Name field: product plus city, not a tagline
- Bio: what you bake, how ordering works, and when the next drop is, in that order
- Profile photo: your best-looking bake or a clean logo, not a selfie at low resolution
- Link: one place that explains ordering, not a dead end or a "DM me" with nothing behind it
- Highlights: three to five covers for Menu, Pickup, Reviews, and Behind the Scenes
That link matters more than people expect. Most bakers start out pointing it at a Google Form or just writing "DM to order," and both of those leak customers quietly. Someone discovers you at 11pm, wants a loaf, finds no price list and no way to pay, and moves on. This is where a lot of cottage bakery owners end up using something like Homebaked, which gets an actual storefront live in about five minutes with no hosting to configure, so the link in your bio goes somewhere that can take an order while you're asleep.
Decide What You're Actually the Person For
The single biggest reason new baking accounts stall is that they post everything. Cookies one week, focaccia the next, a birthday cake, a batch of macarons. It looks like range to you and like noise to a stranger. People follow accounts they can describe in one sentence to a friend.
Pick a lane for the first six months. That doesn't mean you can only ever bake one thing, it means the account has a clear center of gravity. "The sourdough person in Bellingham." "The woman who does the giant cinnamon rolls." "Gluten-free birthday cakes." Specific is memorable, and memorable is what gets you tagged in the comments when someone asks their neighborhood group for a recommendation.
- Name your lane out loud in your bio and in captions, not just in your head
- Your signature bake should appear in the grid at least once a week
- Seasonal variations count as the same lane (pumpkin cinnamon rolls, not a sudden pivot to pies)
- If you truly bake across categories, lead with one and let the others show up as supporting cast
What to Post When You Have Nothing to Show Yet
A common freeze point: you don't want to post until you have customers, and you don't get customers until you post. Break it by posting the process instead of the product. Nobody needs you to have a business to find a bubbling levain interesting (levain is the fed starter you build before mixing a sourdough, and it looks dramatic on camera for about an hour).
Aim for a mix. If every post is a finished, perfectly styled loaf, the account reads like a stock photo feed and gives people nothing to connect to. If every post is a messy countertop, it never looks like something worth paying for. Alternate.
- 1The hero shot: your signature bake, well lit, shot straight on or from directly above.
- 2The cross section: cut it open. Crumb, melted chocolate, cheese pull, layers. This outperforms almost everything else.
- 3The process clip: 10 to 20 seconds of shaping, scoring, laminating, or piping, with no talking required.
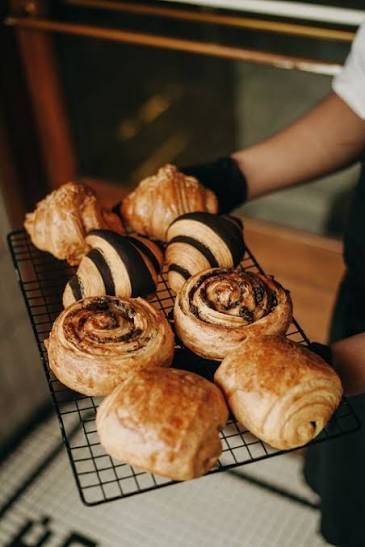
- 4The human post: your hands, your kitchen, you holding a tray. People buy from people.
- 5The practical post: this week's menu, pickup window, how ordering works. Post it every single week even when it feels repetitive.
- 6The story-behind-it post: why you started, where a recipe came from, what you got wrong last time.
Stories are your low-stakes daily habit and the grid is your portfolio. Use stories for mixing day, oven loads, sold-out announcements, and polls about next week's flavor. Save the polished stuff for the grid. The grid is what a stranger scrolls before deciding whether to trust you with twelve dollars and a Saturday pickup.

Shoot Better Photos With the Phone You Already Have
You do not need a camera. You need one good window and the discipline to turn off the overhead lights. Kitchen bulbs cast a yellow-orange tint that makes bread look like it was photographed inside a lamp, and no filter fully rescues it.
- 1Shoot near a window, with the light coming from the side or slightly behind the bake rather than from behind you.
- 2Turn off every overhead and lamp so you only have one color of light in the room.
- 3Tap the screen on the brightest part of the crust to set focus, then drag down slightly to pull back the exposure so highlights don't blow out.
- 4Clear the background. A cutting board, a linen towel, and a bare counter beat a styled scene with a cluttered sink behind it.
- 5Shoot the same bake three ways: straight overhead, at a low 45-degree angle, and a tight close-up of the texture.
- 6Cut it open and shoot again. The interior shot is usually the one that performs.
- 7Edit lightly: a little brightness, a little contrast, a touch of warmth. Skip heavy filters, which make food look fake.
- Steam is your friend, so shoot the moment you tear something open
- Crumbs on the board look appetizing, smears on the plate do not
- Vertical format fills more of the screen and gets more attention than square
- Batch your shooting: photograph a whole bake day in one session and you'll have two weeks of posts
Finding Your First 100 Followers (They're All Local)
The first hundred are the hardest and the most valuable, because they're the ones who can actually drive to your pickup window. Chasing national reach this early is a trap. A viral video seen by 40,000 people in other states is worth less to you than 60 followers who live within fifteen minutes.
- 1Post with a location tag on every single post, using your town or a recognizable local spot rather than a generic region.
- 2Use a hashtag mix that's mostly local: two or three broad ones, and the rest city and neighborhood specific, like #asheville eats or #pdx bakery variations for your area.
- 3Follow and genuinely engage with local accounts: coffee shops, farmers markets, florists, neighborhood pages, other food makers. Comment like a person, not a bot.
- 4Hand out samples at a market or to neighbors with your handle on the bag or a small card. Real-world contact converts far better than cold online reach.
- 5Ask your existing friends and family to share one post to their stories, not to follow you. Shares reach strangers, follows don't.
- 6Post in local Facebook groups and neighborhood apps where it's allowed, and point back to the Instagram account.
- 7Collaborate: offer a local coffee roaster a free batch made with their beans and post it together.
Collaboration posts are the most underrated growth lever for a home bakery. A joint post puts you in front of an audience that already trusts the other account and already lives nearby. Two or three of those in a season will move the needle more than three months of hashtag experiments.
Captions That Do Something
Most baking captions are a flavor name and five emoji. That's a missed opportunity, because the caption is where you turn a nice photo into a reason to come back. You don't need to write essays. You need the first line to earn the tap on "more," and the last line to tell people what to do.
- Open with the hook, not with "Happy Friday everyone!"
- Tell one small true thing: what went wrong, why this flavor exists, who requested it
- Name the price and the pickup day when the post is a drop announcement, every time
- End with one clear next step: comment to claim, link in bio, DM for the list
- Ask questions people can answer in three words, because long questions get no replies
Add alt text to your posts too (it's in advanced settings before you publish). It's a plain description of the image for screen readers, and it also gives the platform more to work with when deciding who should see your post.
Posting Rhythm You Can Actually Sustain
Consistency beats frequency, and both beat intensity. Posting daily for three weeks and then disappearing for a month teaches the algorithm and your followers to stop expecting you. Three grid posts a week and daily stories is a realistic target for someone who also has to, you know, bake.
- 1Pick your bake day and build the content week around it.
- 2Shoot everything on bake day in one 30-minute session.
- 3Draft three captions that night while the details are fresh.
- 4Schedule or set reminders so posts go out on the same days each week.
- 5Announce the next drop on the same day every week so people learn when to look.
- 6Spend fifteen minutes replying to every comment and DM within a few hours of posting.
That last step is the one people skip, and it's the one that compounds. Early on, replies are most of your growth. The problem is what happens when it works: orders start arriving through DMs, a few by text, a couple by email from someone who found you through a friend, and suddenly you're reconstructing Saturday's order list from four different apps at midnight. It's worth having one place that pulls every customer message into a single thread before you need it, which is exactly the mess tools like Homebaked are built to absorb so the growing inbox stays a good problem instead of a reason to quit.
Turning Followers Into Orders
A following that never gets asked to buy anything is a hobby. The shift from "nice photos" to "I'd like two loaves" happens when ordering is obvious, repeated, and low friction. Say how to order in roughly one of every three posts. It will feel excessive to you and will be the first time most people notice it.
- Announce drops on a fixed schedule so anticipation has somewhere to land
- Use "sold out" posts, because scarcity is honest here and it works
- Repost every customer photo and tag them, which gives new visitors social proof
- Keep an email or text list for your regulars so you're not fully dependent on one platform's reach
- Make the first order easy: one item, one price, one pickup window, no decision fatigue
Common Mistakes That Stall New Accounts
- Waiting until the branding is perfect to post anything
- Posting only finished product shots with no human presence
- Chasing national audiences instead of the people fifteen minutes away
- Using the same 30 generic hashtags on every post
- Going quiet for weeks after a slow stretch, right when consistency matters most
- Never naming a price, which reads as "expensive" to people who are afraid to ask
- Measuring success by follower count instead of by DMs, saves, and shares
What Realistic Progress Looks Like
Month one is quiet and that's normal. You're building a back catalog so that when someone does find you, there's something to scroll. Month two or three is usually when a local tag or a collaboration post brings in the first cluster of real neighbors. Somewhere around a few hundred engaged local followers, you'll typically have enough demand to sell out a modest weekly drop, which is a far more useful milestone than any round number on your profile.
Watch saves and shares more than likes. A save means someone is planning to come back to that post, and a share means they're recommending you to someone else. Those two numbers predict orders. Likes predict almost nothing. Keep showing up, keep cutting things open on camera, and let the account be a record of a real kitchen rather than a brand launch.